Content
Installation
- Joomla version: 3 OR 4
- PHP:
- PHP Extensions: ZIP Library
- PHP: [magic_quotes_gpc = Off]
Download & Install
Apply for new installations & upgrades. Before proceeding, always remember to BACKUP your site first.
Get the latest version of the JLex Comment at the download page: https://www.jlexart.com/downloads
At the admin section of your website, follow these steps:
- Joomla 3: Extension > Manage
- Joomla 4: System > Install > Extensions
Select Upload Package File tab > Select the downloaded file to install.
Export/Import Data
Exporting the data creates a compressed file, which can be used to import data on other websites or can be used to restore data later.
Joomla Article
Export
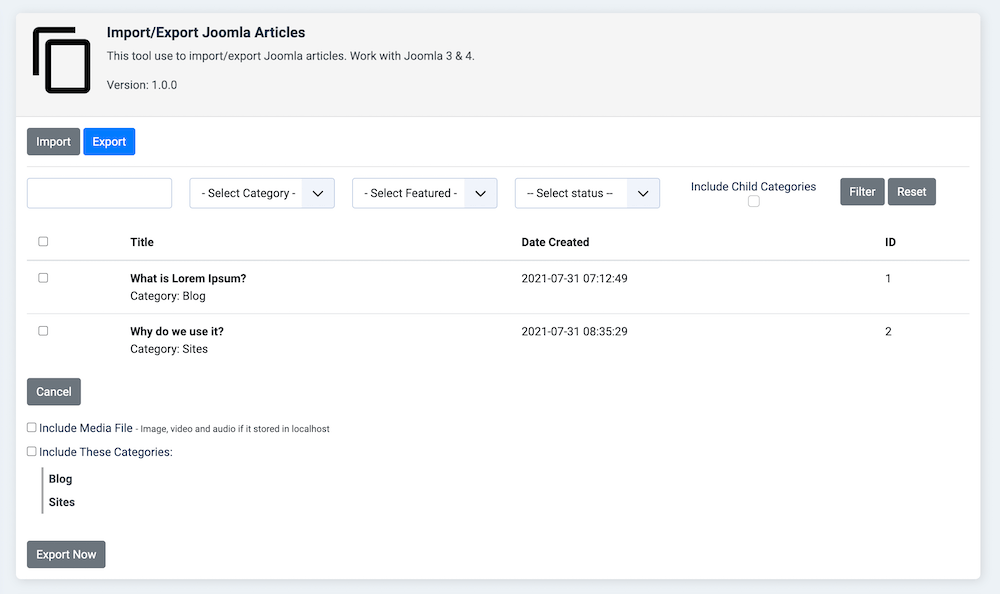
You can back up selected articles or articles based on the current filter.
- Click "Export Items Selected" to back up the selected articles.
- Click "Export All" to back up the articles based on the current filter
Filters include:
- Query: Find articles based on the phrase typed.
- Category: Find articles in a category (can include subcategories)
- Featured: Find featured articles.
- Status: Find articles based on its status: Published, Unpublished, Trashed.
You will then be asked if you need to back up the following:
- Media: The images, video or audio found in the article. Note that these multimedia files must be hosted on your website.
- Categories: Back up the categories of posts. Later when importing data, these categories will automatically be created and linked to the above articles.
Once the data export is complete, click "Done! Download the backup file." to download the compressed file.

Import
This compressed file is used to restore (in case the website loses articles for some reason) or to copy these articles to a new website.
To get started, go to Import/Export Joomla Articles > Import.
If the compressed file is large (cannot be uploaded by the usual method), you can download it via FTP or the hosting's File Manager. After upload, select "Import from File" instead of "Upload Package File"
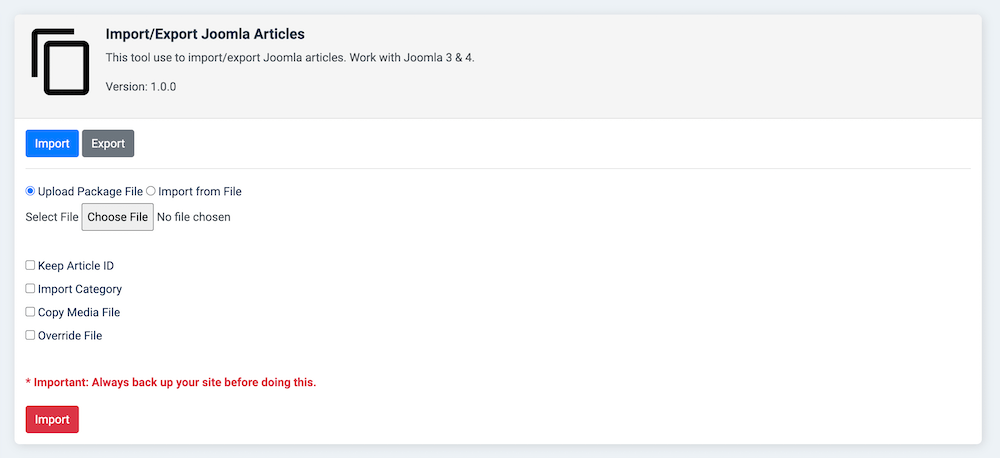
Other options include:
- Keep Article ID: Keep the post's ID. In case this ID already exists, the imported article will use the new ID.
- Import Category: Import categories in the source website. These categories will automatically link to articles on the new website after being imported.
- Copy Media File: Select it if the compressed file contains images, videos or audio and you want to copy it.
- Override File: Overwrite existing files.
The User list
Export
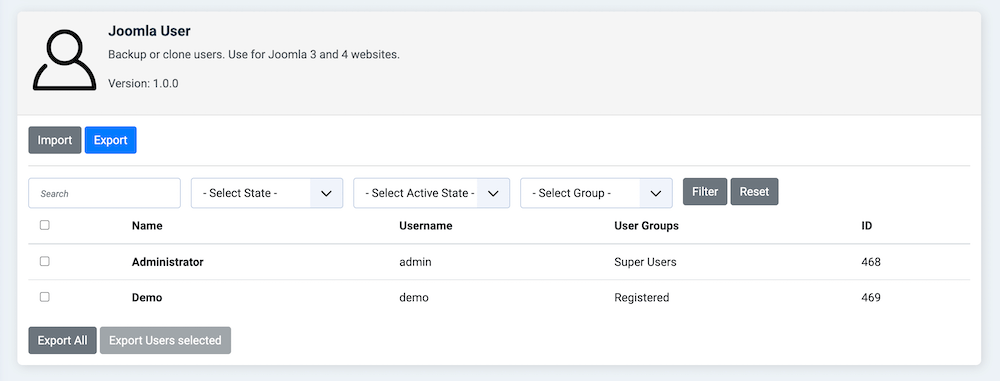
Similar to article data export, this tool helps you to export user data on the current website.
- Click "Export Users Selected" to back up the selected users.
- Click "Export All" to back up the users based on the current filter
Filters include:
- Query: Find members based on the phrase typed.
- Group: Find members based on user groups.
- Status: Find members based on its status: Enabled, Disabled.
After the data export is completed, click the "Download" button to download the compressed file.
Import
Similar to the article, once you have the archive, you can restore or copy the user list to the new website.
After selecting the file, click the "Check" button to let the system analyze the file.
Then a list of user groups will be displayed for you to reconfigure.
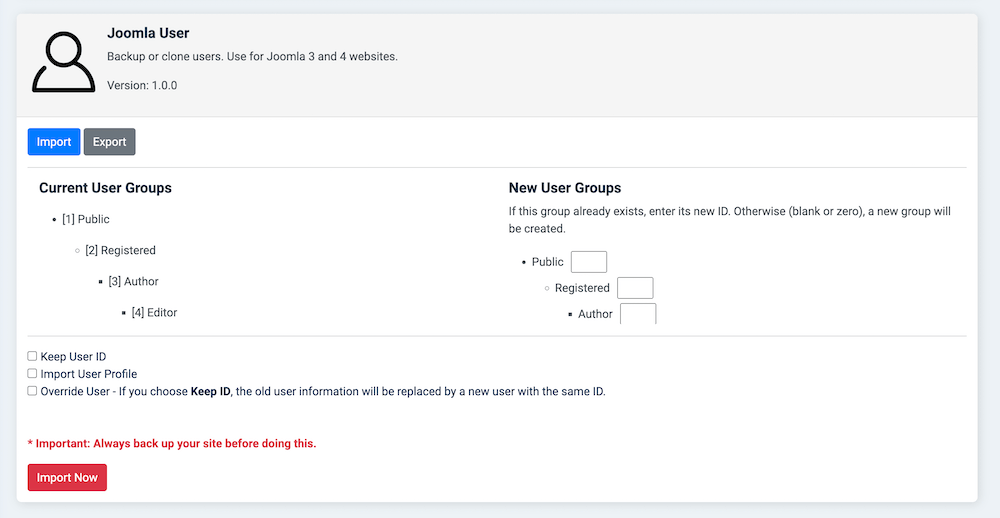
In case the user group already exists, enter the ID of that group. If left blank, or zero, the extension will create a new user group.
You also have the following options:
- Keep User ID: Keep the user's ID, in case the ID already exists and don't select "Override User", a new ID will be generated.
- Import User Profile: Enable it if you are activating the User - Profile plugin.
- Override User: If you choose Keep ID, the old user information will be replaced by a new user with the same ID.
Finally, click the "Import Now" button to restore or import user data.
Module settings
Backup or copy the settings of any module. This tool saves you time in setting up the module on a new website.
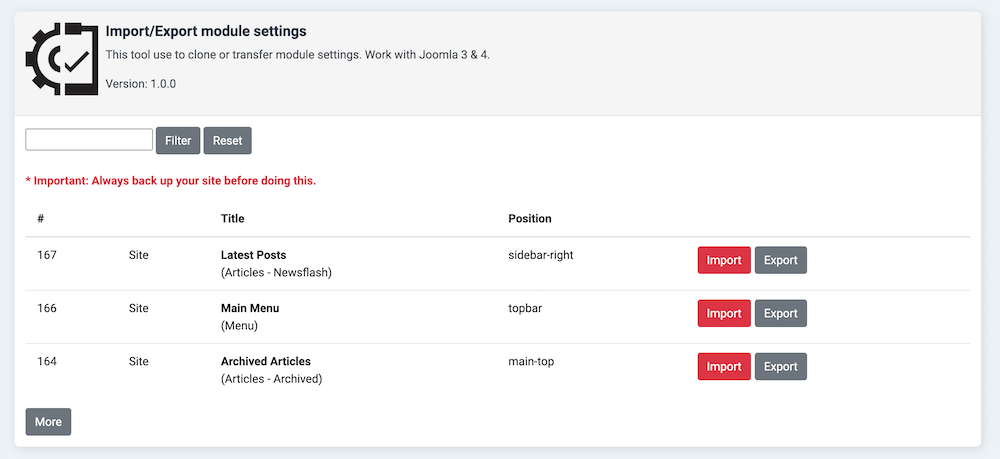
For example you have an image presentation module, in the setup you need to declare the image gallery, related settings like effects, styles... It is running perfectly and now, you want "copy" this module to a new site. JLex Transfer will help you set it up quickly.
Install JLex Transfer on both websites. On the source website, select Import/Export module settings > Select image presentation module > Export > Export to settings file.
On the destination website, after installing this photo presentation module, go to JLex Transfer > Import/Export module settings > Select image presentation module > Import > Select the above settings file > Done.


